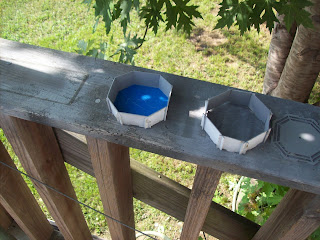
Well, been busy finishing the build on the battery boxes, and main feet. got them mounted together.
And some pics of my mock up. All the detail pieces on the body are just taped in.
Sorry about the sideways pics. Forgot to turn them around.
Thursday, November 18, 2010
Sunday, November 7, 2010
I'm back!!!
Man! Where to start. Got a bunch of stuff done. Well, Physically built but not a finished product. The list Main feet, started center foot, center ankle, and have my rockler.
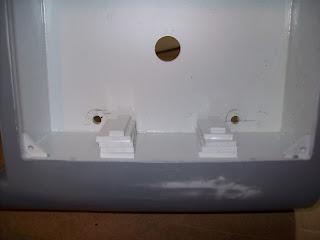
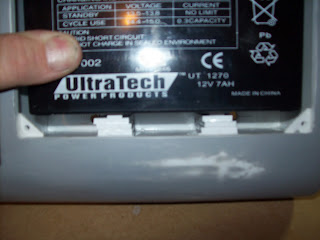
I also have one batt, box built and the other almost done. Had a problem with the room inside for the battery. Dave's plans call for a 7amp/hr battery to be installed in them. when I tried to put mine in, the battery would hit the little tabs that the cover screws into. So I had to take off the upper two tabs and lift the battery up to clear those tabs.
The battery is right up against the back of the tabs,so it shouldn't shift side-to-side.
Then I had to add a tab along the width of the cover.
And two smaller tabs where the other two on the box where before.
Install battery and Viola!
Hope that wasn't to confusing. Now to do it to the other one!
Wednesday, August 25, 2010
Motors arrived!!!!
Now remember folks, these are for a styrene build.
Wow!! They are small! But Dave Everett say his runs fine with them. Another step closer.
Sunday, August 22, 2010
My first electronics!!
I bet a bunch of you know what this is!
My first of two motor controllers.
My first step to getting r5 mobile!!
It's a 2x10 R/C. It should be enough for the smaller motors that I'll be using.
My first of two motor controllers.
My first step to getting r5 mobile!!
It's a 2x10 R/C. It should be enough for the smaller motors that I'll be using.
Saturday, August 14, 2010
Oops!
I found myself making more progress backwards than forewards tonight. I was trying to make a keyhole slot in the back of my horseshoes to mount them onto the leg. I laid it all out nice and neat. Started to router in the keyhole and BAM!!!
The router started to melt the plastic and made a wad that siezed up in the hole. And proceded to run itself across the horseshoe!
Luckily this was on the backside of the horseshoe, so it won't show. Will get a good night's rest and look at it tomarrow.
The router started to melt the plastic and made a wad that siezed up in the hole. And proceded to run itself across the horseshoe!
Luckily this was on the backside of the horseshoe, so it won't show. Will get a good night's rest and look at it tomarrow.
Sunday, August 8, 2010
Feet, Battery boxes
Ok. Been a while since my last update. Have been working a lot. started on R5's feet. These aren't like regular r2 feet. They don't have seperate drive train and shells. It's all one piece.
Still have work to do on them. Also awaiting the motors. Hopefully I'll have them in a couple of weeks!
Also started on the battery boxes. They each will hold 1 7amp/hr. 12 volt battery. Plenty of power for him!!!!
Still have work to do on them. Also awaiting the motors. Hopefully I'll have them in a couple of weeks!
Also started on the battery boxes. They each will hold 1 7amp/hr. 12 volt battery. Plenty of power for him!!!!
Sunday, July 18, 2010
Skins and detail paint
OK, busy weekend! Since i put together the skin flatpack i got from A&A. I decided to put on the skins. It does take a while to get everything "just right., and with a litte taping help from my daughter and wife their on!!!
After that I couldn't help but putting on a few other parts!
Then on to some painting!
Then couldn't resist seeing some of them in place. This is when I get motivated!!!
It start to look like a real droid when the small stuff is on it. Other wise it is a big lump of plastic.
Can't wait to do more!!
After that I couldn't help but putting on a few other parts!
Then on to some painting!
Then couldn't resist seeing some of them in place. This is when I get motivated!!!
It start to look like a real droid when the small stuff is on it. Other wise it is a big lump of plastic.
Can't wait to do more!!
Subscribe to:
Comments (Atom)


